News Center
How to Install Deep Groove Ball Bearings Correctly: 4 Common Mounting Mistakes to Avoid
2026-11-17
Most so-called “bearing failures” trace back to the last few millimeters of the mounting process.
As customers demand shorter lead times and maintenance-free operation, there is less room for error at the point of installation. Across the industry, many of the quality complaints we encounter are ultimately traced to improper mounting—hammer marks on the raceway, press-fit indentations, hardness loss from overheating. These failure signatures are distinguishable through a basic failure analysis. Deep groove ball bearings are simple in structure and used in high volumes, and precisely because they “look easy to install,” basic mounting discipline is often overlooked on the shop floor. The four mistakes below are the ones we encounter most often.
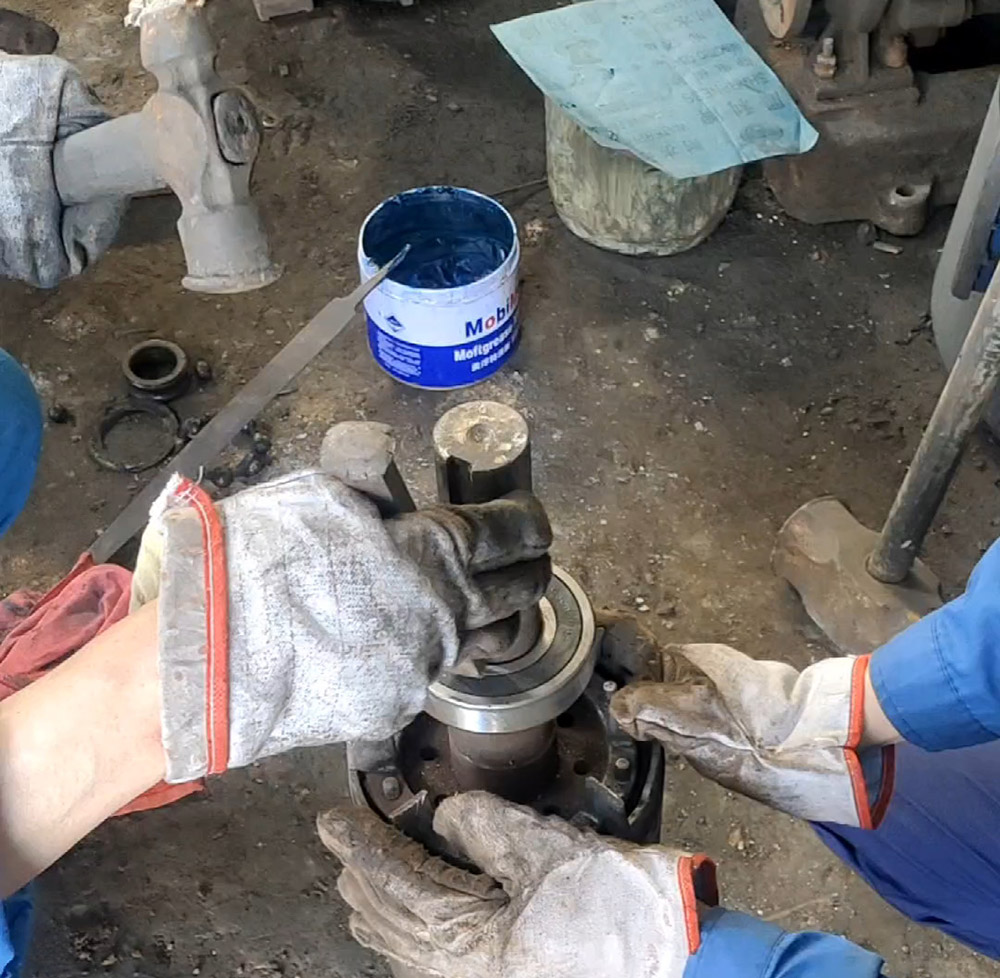
Mistake 1: Force transmitted through the balls—or direct hammering
These are the two most common errors, and they share the same root cause: mounting force or impact travels through the rolling elements. When pressing, if force is applied from the outer ring to the inner ring (or vice versa), the raceway takes indentations. Hammering is worse—regardless of where the hammer lands, the impact passes through the raceway. At best this leaves micro-indentations that cause noise; at worst it deforms the cage, and on sealed types the seals may also be damaged.
The correct approach: for a tight fit on the shaft, force should act on the inner ring only; for a tight fit in the housing, on the outer ring only; when both rings require a tight fit, force should be applied to both simultaneously. Use a press or an induction heater—not a hammer.
Mistake 2: Heating by feel
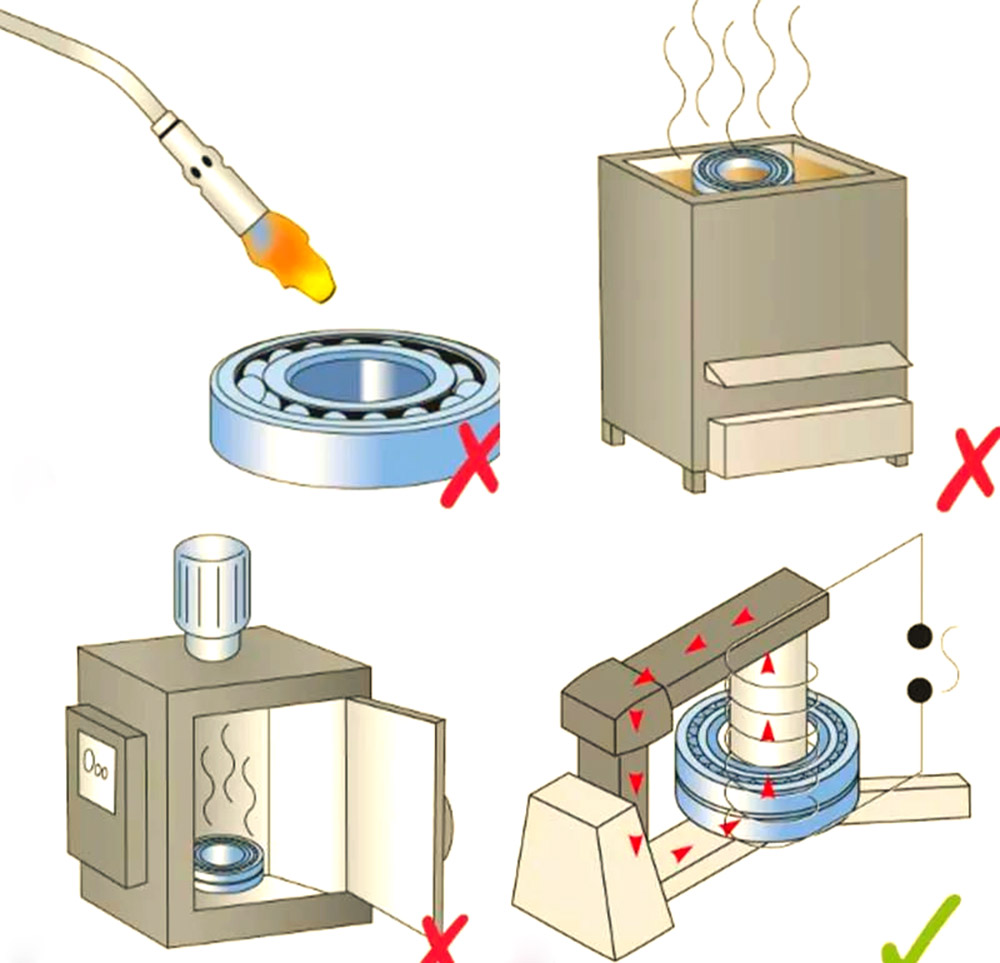
Heat mounting is routine, but uncontrolled temperature is a silent killer. Heat mounting temperature is generally kept within 120°C; excessive temperature affects ring hardness and may also damage seals and grease. An induction heater offers more direct temperature control and avoids the residual oil and carbonization risks of an oil bath. Once heated, seat the bearing promptly and maintain axial pressure until it cools.
Mistake 3: A contaminated work area
If a bearing is exposed to a dusty environment before it is even unpacked, contaminants will find their way into the raceway sooner or later. The basics: a dust-free, low-humidity work area, and installation immediately after unpacking. In addition, compressed air carries moisture and particles and is not recommended for drying bearings. Check shaft journal and housing bore cleanliness before assembly; this step cannot be skipped.
Mistake 4: No post-installation check
Power on and walk away, then disassemble when a problem appears. The correct practice is to rotate the bearing by hand after installation, confirming there is no binding or abnormal noise, and to watch for abnormal temperature rise during initial operation. A simple rotation check catches most mounting problems before they become failures.
None of the four points above requires advanced technical background to execute—but ignoring any one of them can cause a fully compliant bearing to fail prematurely. We have seen too many hammer marks and press-fit indentations on raceways: the problem is often not the bearing itself, but the last few millimeters of the mounting process.
If you have questions about selection or installation, our technical team is glad to help. Please feel free to contact.